
Protopage is your own personal page that you can access from any computer, tablet or smartphone. You can monitor news headlines from almost any web site. Your page can be private or public. Keep bookmarks, to-do lists, sticky notes, and much more.
Ideas for using Protopage:
- A 'start page' to give you quick access to your most important bookmarks
- Keep up with news from almost any web site
- Create a page to share information with your company, classroom or with the public
- Protopages can be public, private, or restricted to only those that know the password
- You can create as many Protopages as you need!
The parts of your Protopage

The search bar allows you to quickly search different web sites. You can customize the list by clicking the ≡ icon at the right side of the search bar. You
can even add your own custom search button that will only return results from certain web sites.

At the top of your Protopage are the toolbar buttons. Use them to add widgets to your Protopage, and change the color scheme/wallpaper of your Protopage page.
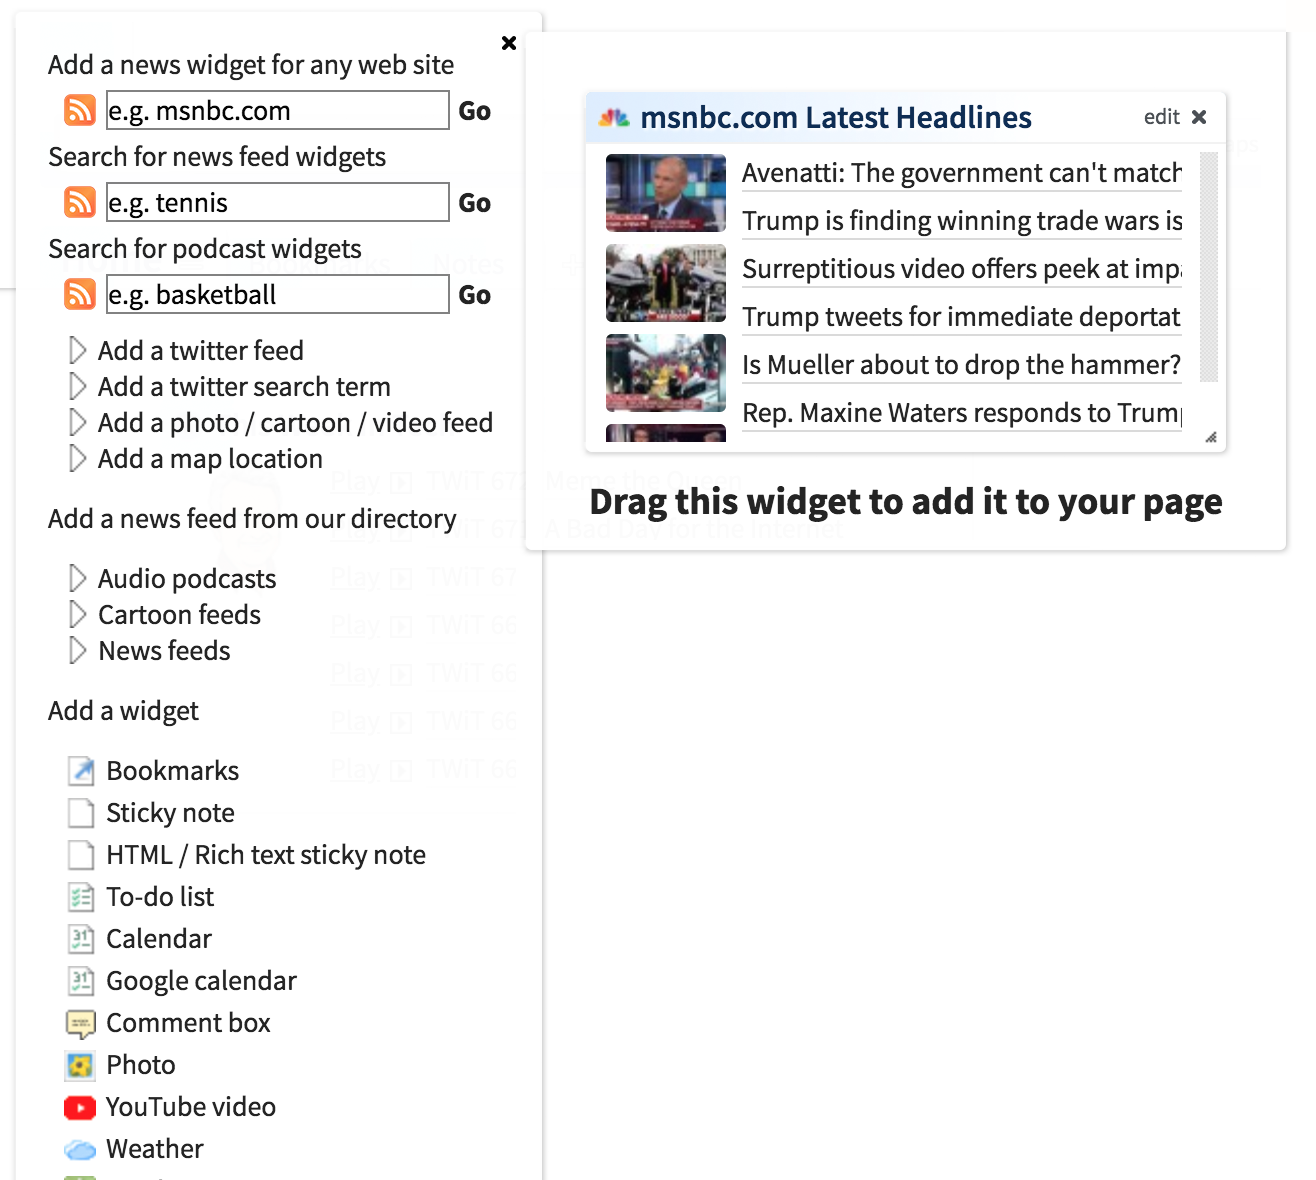
Click the 'Add widgets' button on the toolbar, and then choose a type of widget to add to your page. You can enter almost any web site address (e.g. nytimes.com)
and Protopage will automatically figure out how to create news headline widget for you from that site. There are other types of widget, such as sticky note widgets,
to-do lists, weather and much more.
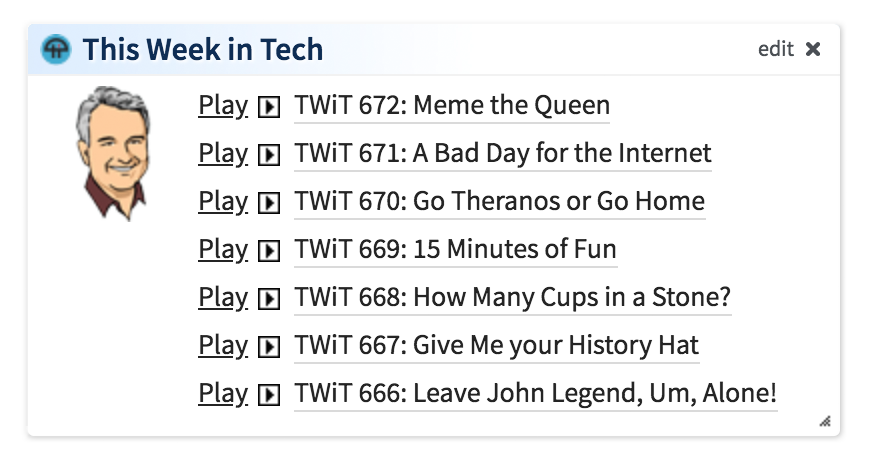
This is an example of a news widget. Protopage will automatically detect if any of the headlines on the web site contain podcast content, and will allow you to
play the podcast inside your Protopage.
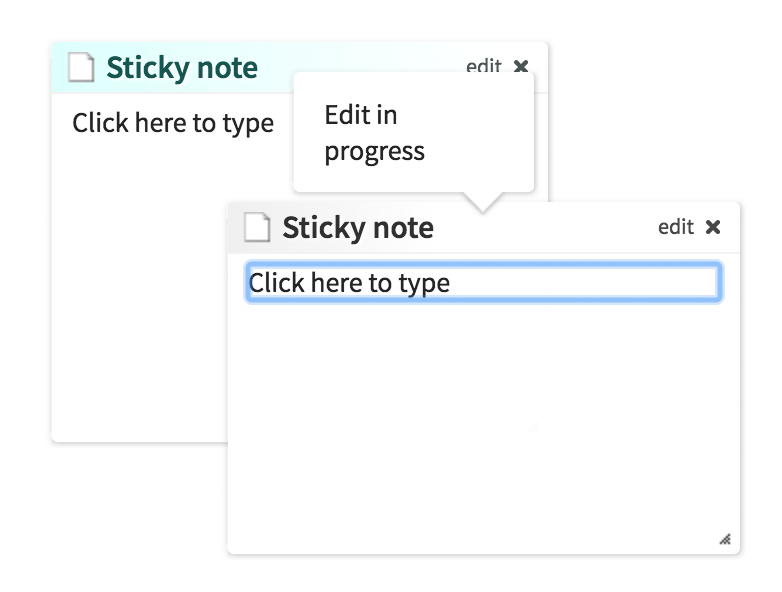
Some widgets like sticky notes, can be changed by clicking directly inside the widget and typing. Other widgets, such as weather, require you to click the 'edit' button
to configure the contents.

You can create tabs inside your Protopage to organize the content better. You can move widgets between tabs by dragging them to the new tab. To rename a tab, click it once
to navigate to that tab, then click again on the label to edit the label. You can also drag tabs to reorder them.
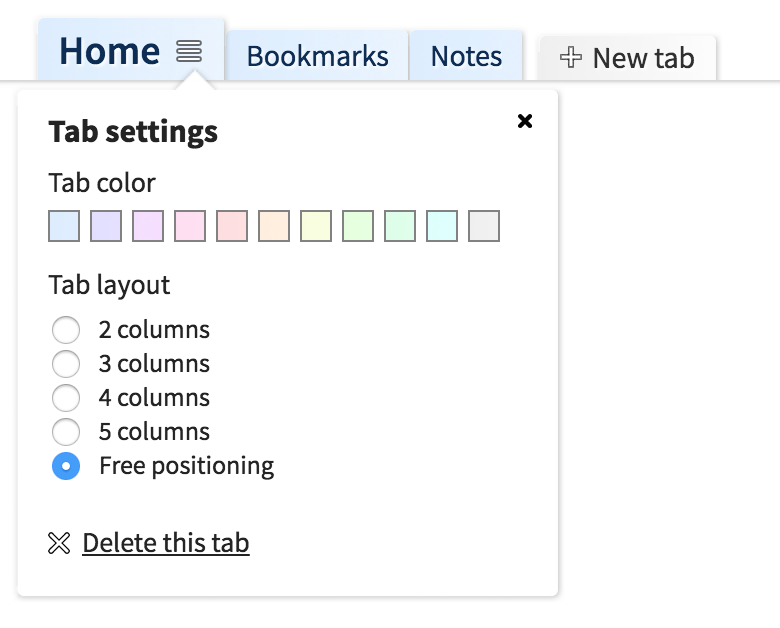
You can click the ≡ icon on the currently selected tab to edit the tab color and layout. You can choose how many columns you want, or switch to freeform positioning
to arrange your widgets wherever on the page you want.
When you click the  button at the right side of your list of tabs,
you will reveal the option to create multiple categories of tabs.
A teacher, for example, might create a category of tabs for each different class they teach.
You'll notice that the address bar in your web browser changes when you navigate to different tabs in different
categories. This means you can give other people a direct link to a specific tab inside your Protopage.
button at the right side of your list of tabs,
you will reveal the option to create multiple categories of tabs.
A teacher, for example, might create a category of tabs for each different class they teach.
You'll notice that the address bar in your web browser changes when you navigate to different tabs in different
categories. This means you can give other people a direct link to a specific tab inside your Protopage.
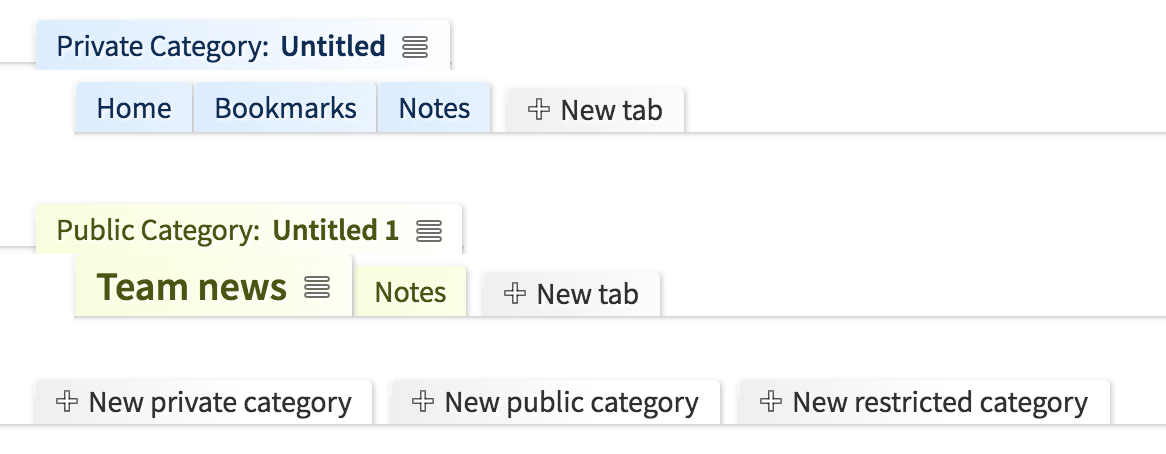
You'll notice that you can create private, public and restricted tab categories.
- Private categoriesTabs inside private categories can only be seen by someone that logs in using your main Protopage password.
- Public categoriesTabs inside public categories can be seen by anyone that knows your Protopage URL. This means you can effectively make your Protopage into your own publicly accessible web site.
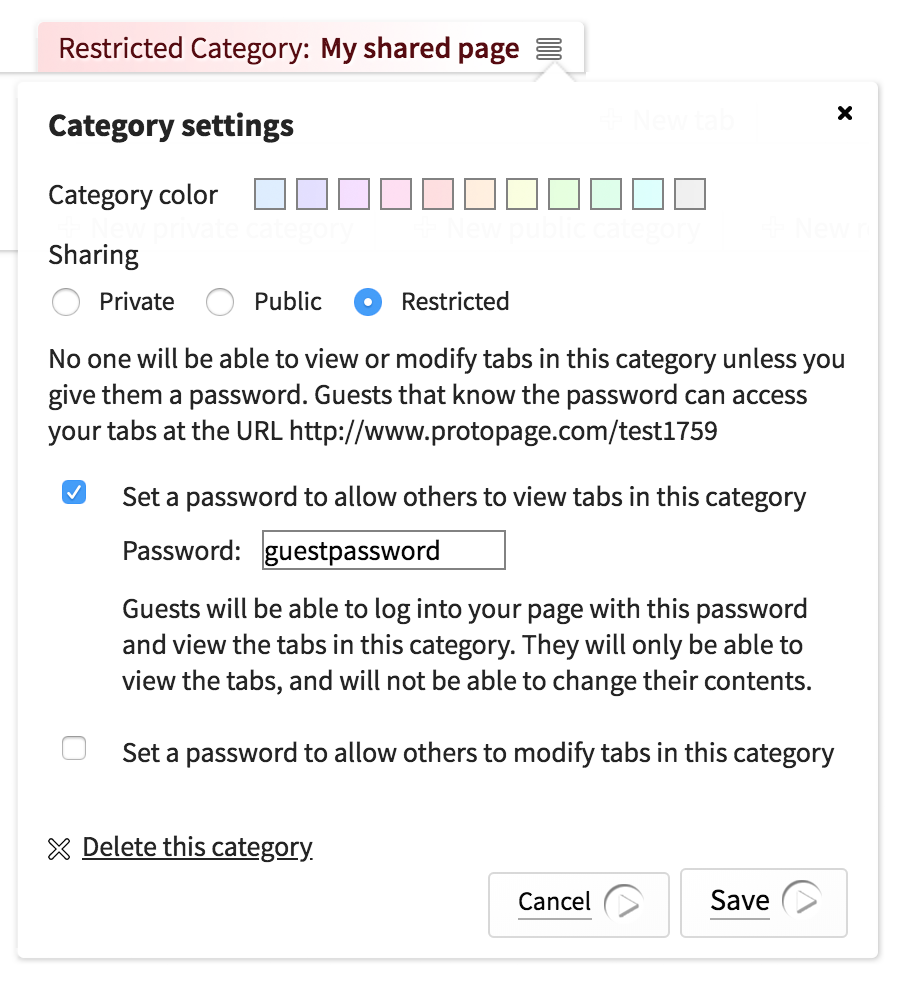
- Restricted categoriesRestricted categories can have special passwords that allow people to view or edit tabs in those categories. This means you don't need to give out your main Protopage password. You can just give out a password that lets people view certain parts of your Protopage.For example, you might give out a "view" password so that students can log in to view a tab category, but cannot change anything. You might give out a "modify" password to allow other teachers to view the tab category and make changes.
Note that you can only set these public/private/restricted permissions on a per-category basis, and you cannot make different tabs within the same category have different permissions.